Before we begin with this post, just to give you an idea about me and about this roadmap; I have been doing the Fullstack Development for the past 5 years and currently working as a lead engineer at tajawal where I have to wear many different hats. It is not only my hobby but also one of my job responsibilities to keep an eye on the trends and to keep the other developers well trained. I see a lot of confusion among the beginners (and experienced alike) when it comes to staying up to date. I had lots of friends and emails asking me for guidance back in 2017 on what should they learn if they want to be in this career. So to save myself the hassle and to help the others, I decided to prepare these charts once and for all, so that whenever somebody would ask, I would just share the link to these charts. And this is how these charts were born.
Initially they were just flat out recommendations for the tools but I decided yesterday to give them a bit more structure, add details and design them in the steps form so to give you a better idea about what to pick and in what order.
I am still working on the Backend and DevOps parts but the frontend part is ready and you can have a look at it below.
Before I go about explaining different sections in the roadmap, let me take the time to put this disclaimer here:
The purpose of this roadmap is to give you an idea about the landscape and to guide you if you are confused about what to learn next and not to encourage you to learn what is hip and trendy. You should grow some understanding of why one tool would be better suited for some cases than the other and remember hip and trendy never means best suited for the job
So let’s get started —you can find the detailed image below, however in this article I will explain each step in the roadmap one by one also.
First thing that you would want to do is learn the basics which includes learning the basics of HTML, CSS and some familiarization with JavaScript syntax.
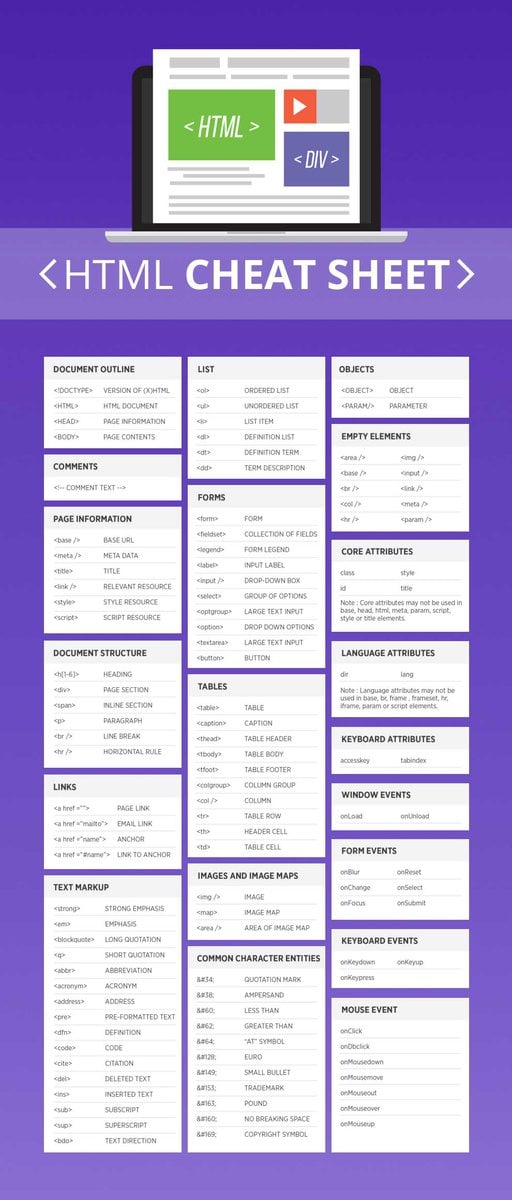
Learn the basics of HTML
HTML is what gives structure to your pages. Its like the human skeleton that keeps you standing. First thing that you would want to do is learn the syntax and learn everything that it has to offer. You should focus on learning the below:
- Learn the basics and how to write semantic HTML
- Understand how to divide page into sections and how to structure the DOM properly
Task — Once you have learnt the basics of HTML, make at least 5 HTML pages. I would recommend you to pick any website e.g. look at any github profile page or twitter’s login page. And focus on structuring the content properly. It is going to be ugly, but don’t worry about that for now and keep your main focus on proper structure.
Learn some CSS
Now that we have learnt how to prepare the skeleton for the page, its time to add some skin on top of it and to make it look beautiful. CSS — Cascading stylesheets are used to add beauty to your HTML pages.
- First thing that you will have to do is learn about the syntax and familiarize yourself with the common CSS properties.
- Learn about the box model and how to prepare layouts using Grid and Flexbox
- Once you are done with that, learn how to make your websites responsive with media queries.
Task –– Once you have the basics out of the way, next thing that you should do is style the HTML pages that you made in the last step. For example if you wrote the HTML page for the Github profile, its time to apply the CSS and make it actually look like the actual Github profile page. Do so with all the 5 pages that you wrote in the previous step.
Learn the Basics of JavaScript
JavaScript is what lets you make your HTML pages more interactive. For example all these sliders, popups and toast notifications that you see on websites and when it reloads certain parts of the pages without having to reload the page, it is all done with JavaScript. In this step, you are going to learn the basics of JavaScript to prepare you for the Journey –
- Learn the syntax and the basic constructs of the language.
- Learn how to manipulate DOM with JavaScript e.g. how to remove some element from the page, how to add some element, adding and removing classes, applying CSS styles etc with JavaScript.
- After you are done with that learn and understand the topics such as scopes, closures, hoisting and event bubbling etc.
- Learn how to make HTTP calls with XHR or Ajax. Ajax is what lets you perform certain actions without reloading the page.
- After you have learnt that now it is time to learn about all the new features in ES6+. ES6 is just a version of JavaScript which introduced lots of interesting updates to the language e.g. classes, different ways to declare variables, added new methods to arrays, string concatenation etc. Most of the articles that you will find online, they will use Babel to explain ES6 which is a transpiler that converts the new JavaScript to old JavaScript since it is not supported by the old browsers. But don’t worry about Babel for now, just get the idea about the concepts and use them in any of the latest browser which support ES6 for practicing. We will revisit ES6 later on.
You should now be feeling that the things are getting real. You need a pat on the back if you have been following along. These were some of the most important things that you have just learnt 👏
Should I learn jQuery?
There was a time when every one was crazy about jQuery and for good reasons; it was a powerful library that provided a wrapper on top of JavaScript and let you perform anything in a browser compatible way. But long gone are those days now, it isn’t being used that much for the new projects but there are still people using it. You don’t have to learn it but it is really easy and it would be beneficial for you if you want to have a look.
Time to Practice
I say this a lot and I will say it here again, you don’t learn anything without practice. You might have a momentary feeling that you understand something but it would soon go away if you don’t practice. Make sure that you practice as much as you can, while you are following this roadmap.
Go ahead and make some responsive website and add interactivity with JavaScript. You can copy any existing webpage that you might find interesting online but remember to use everything that you have learnt till this point.
Once you have made some of the websites, its time to get into the real business now. So go to github.com and search for some projects and try to open some pull requests on some open-source projects. Some of the ideas for pull requested are listed below :
- Enhance the UI, make any demo pages responsive or improve the design
- Look at any of the open issues that you can solve
- Refactor any of the code that you think can be improved
Link this repo, tell them you are learning and ask for feedback on your PR and how you can improve.
While I would recommend this Github part, it needs some knowledge of git and is optional. You don’t have to do this but if you do, you will find it really beneficial — you will be amazed that how many people are willing to help you if you just ask. You can find many free resources for git, try this one.
Give yourself a pat on the Back
You have got the basics out of the way. If you have learnt everything well, you can find yourself some freelance work or maybe a full time job. However, don’t stop here, there is still a long way to go if you want to have a better career.
Package Managers
Before this point, if you were to use some external library e.g. a plugin or any external widget, you have to download the JavaScript and CSS files manually and put them in the project, and then those libraries or plugins release new versions, you have to download the newer files and put them in your projects again, which is an extreme hassle. Package managers take this hassle away from your workflow. They help you bring external libraries and plugins into your projects, so that you don’t have to worry about copying the libraries manually or go through the hassle of updating them when they release new versions. There is
yarn and npm available. Both are almost same, there are only implementation, you can pick any of them and once you learnt to use one the other would be just the same.Let’s use what we have learnt
After you have got the basic understanding of package managers, go ahead and install some external library in the webpages that you made above e.g. install some toast plugin and when user clicks a button, show him the toast message or create a login form and do the form validation using some form validation library and play with different options and see how to install different versions.
While you are at it, make sure to read about semantic versioning
CSS Preprocessors
Preprocessors enrich CSS with the functionality that it isn’t capable of by default. There are different many options Sass, Less, Stylus etc. If I were to pick one, I would go for Sass. However, PostCSS has been gaining a lot of traction lately, it is a nice-to-have and is sort of “Babel” for CSS. You can use it stand-alone or on top of Sass also. I would recommend you to learn Sass for now and revisit PostCSS later when you have time.
CSS Frameworks
You don’t need to learn CSS frameworks any more, however if you would want to pick any, there is one under every rock. The ones that I liked the most among the ones that I tried are Bootstrap, Materialize and Bulma. But if you look at their demand in market I would pick Bootstrap if I was starting today.
CSS Organization
As your applications grow, CSS start to become messy and unmaintainable. There are multiple ways to structure your CSS better for scalability e.g. there is OOCSS, SMACSS, SUITCSS, Atomic and BEM. You should know about the differences between them but I prefer BEM.
Build Tools
Tools to help you in the building/bundling and development of JavaScript applications. This category includes linters, task runners and bundlers.
For task runners, there used to be different many options including npm scripts, gulp, grunt etc. But at this time, since webpack lets you handle most of the stuff that we used to do with gulp, there is only npm scripts in the task runners now which you can use to automate the tasks that webpack might be capable of doing. You don’t need to learn Gulp, however later on if you find some time, feel free to have a look at it and see if it can help you in your application.
For the linters, again there used to be many options including ESLint, JSLint, JSHint and JSCS. But currently there is mostly ESLint so go for it.
For the module bundlers, again several different options including Parcel, Webpack, Rollup, Browserify etc. If you have to pick one, close your eyes and pick Webpack for now. Rollup is quite common also but it is recommended to be used mostly for the libraries; when it comes to apps, there is webpack. So teach yourself webpack for now and revisit this section for Rollup later on if you want to.
Time to Practice — Create something
Congrats! You can call yourself 75% modern JavaScript developer now. Now go ahead and create something with all that you have learnt. Maybe create some sort of library in which you have to use Sass and JavaScript. Then use Webpack to convert Sass to CSS and use babel in it to transpile ES6 code. Once you are done with, release it on Github and npm.
Pick a Framework
In the old roadmap, this section used to be next to the basics but I changed it to be after Sass, build tools and package managers because you will be using all of that in the frameworks and without the knowledge, it might seem scary to you.
Again in frameworks, there are several options. But commonly used one these days are React, Vue and Angular. There is more and more demand for React.js these days. However, you can pick any of the listed ones and you will be fine. Personally I would pick React or Angular. Just a quick note here, as a beginner you might find Angular to be a bit easier comparatively, probably because it supports almost everything out of the box e.g. powerful router with support for lazy loading, HTTP client with support for interceptors, dependency injection, component CSS encapsulation etc without having to worry about picking external libraries. But React definitely has an upper hand looking at the community around it and the way team at facebook has been working to improve it. Just make sure to not pick anything because of the hype of it, google it, compare and see what suites you best.
I will leave the comparison and my personal experience with both for another post but since this post is about learning, here is how you might find the learning curves for Angular and React
Learn curves in the graph below consider the fact that you already have an understanding of TypeScript and basic idea of Rx.JS. For the “why” I will cover that in some future post but mainly it is because of some of the standardization and some of the key features that angular provides out of the box. But that doesn’t mean React is bad, both have their own place, I will cover that extensively in some upcoming post.
Have a look at both and see what suites you best.
Once you have made your choice for framework, there are certain other things that you might have to learn. For example if you decided to go with React; you might have to learn Redux or Mobx for the state management, depending upon the size of application that you will be working. Mobx is suitable for small to mid-sized applications, Redux is more suitable for larger scale applications. And you might even not need any of them and depend upon the native state management in React if your app allows that.
If you pick Angular, you will have to do TypeScript (you can develop angular applications without it also but it is recommended to use it) and Rx.js which will also benefit you out of your Angular applications. It is a really powerful library and is also suitable for functional programming.
And if you pick Vue.js, you might have to learn Vuex which is sort of similar to Redux but for Vue.
You should note that, Redux, Mobx and Rx.js are not just bound to these frameworks, you can use these out in your vanilla JavaScript apps also. Also, if you pick Angular from the list, make sure it is Angular 2+ and not Angular 1+
Time to Practice
Now you know _everything_ that one might need to build a modern JavaScript application. Go ahead and make some application with whatever framework you picked. You can find some of the ideas in the
ideas directory in the repository; pick anything and start!
And once you are done making, read about how to measure and improve performance. For example look at Interactivity Time, Page Speed Index, and Lighthouse Score etc
Progressive WebApps
And once you are done with all of steps listed above, learn about service workers and how to make progress web apps.
Testing your Apps
There are lots and lots of different tools for different purposes. I mostly find myself using a combination of Jest, Mocha, Karma and Enzyme. However, before you jump and pick any, it would be better if you first understand the different testing types, look at all the options available and use the ones most suitable for your needs.
Here is a really nice summary to get you started
Static Type Checkers
Static type checkers help you to add type checking to JavaScript. You don’t need to learn these but they really give you superpowers and can be learnt in a few hours and then you can keep . There is mainly TypeScript and Flow. I love TypeScript and would pick it but feel free to check both and pick one of your liking.
Server Side Rendering
The skills that you have got till this point should be sufficient to get you a position for any of the “Frontend Engineering” roles. But don’t stop here!
Learn about server side rendering in whatever framework you picked. There are different options, depending on what framework you are using. For example if you decided to use React, most notable options are Next.js and After.js. For angular, there is Universal. And for Vue.js there is Nuxt.js.
There could be things still missing in the roadmap but this is all of what you need for any “Frontend Engineering” role. And remember the key is to practicing as much as you can. It will look scarier in the beginning and you will feel like you are not grasping but that is normal and over time you will feel that you are getting better and better. And don’t forget to ask for help if you are stuck, you will be amazed by how much people are willing to help ..or at least I am 😉
Feel free to befriend me on twitter or say hi by email. And with that this post comes to an end. Until next time, stay tuned!
Sưu tầm: Modern Frontend Developer in 2018